September 28, 2012

Just show us your house already!

Okay, I know I am taking a while on my house tour.  I have over 500 pictures in a folder on my computer labeled "house pictures" that have been taken over the course of the past 5 years...of my house.  Crazy, I know.  It just keeps changing and I like to document the updates.  Therefor, I am thinking at the rate I'm going on this house tour, my whole house is going to change again before you even get to see it all!  So here is a picture tour of how my house looks right now (or within the last month).  Not every room is 100% finished, or wait, is that even possible?! 


laundry (off of kitchen)
hall bathroom


master bedroom


master bath


Moving on down to the newly finished basement (it's a long way from being "finished" from a decorating standpoint though)


September 26, 2012

The Kitchen


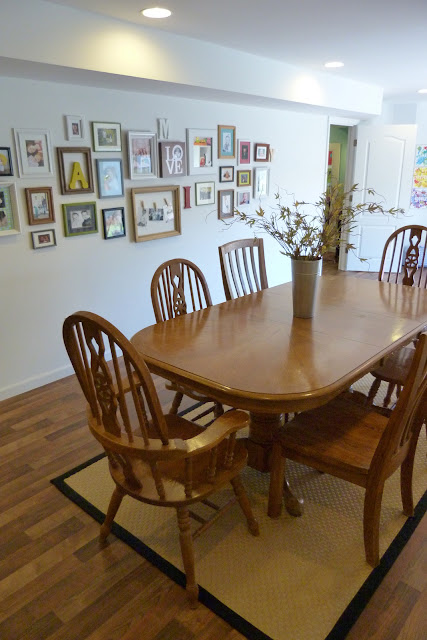
It's a dining room and kitchen in one, so it's on the small side.  This room and our living room are open to eachother so I kept the colors cohesive.


I am not going to go into all the details just yet but I'd like to show you a throw-back picture of what this kitchen looked like about 3 years ago:
Before (taken in 2008)
After
Can you spot all of the changes?!  I'll have to explain the many things we've done in here over the course of a few posts.  There are also a few things left on my "wish list" to do in here like:
1.  add a backsplash
2. carry the dark wood laminate floors from the living room into the kitchen (we have the flooring sitting in our basement)
3.  upgrade the laminate countertops (I've thought about painting them with RustOleum's countertop transformation kit) 
4.  get a new sink and faucet (ours work but aren't very pretty)
5.  Add a rug under the dining table (after the flooring gets finished)
 
I'll be back with more...
 

September 19, 2012

My son

I'm straying away from the house posts because I took some super cute pictures of my youngest, Owen, today and wanted to share them.  He is 5 1/2 months right now and can sit up unassisted.  This makes it very easy to take his picture, unlike my toddler daughter who never wants to sit still or smile for the camera.  It was a nice cool, fall day today and while Jada was napping, Owen and I went outside and I let him sit and play in the grass for the first time.  He loved it! 
Isn't he so cute?  I take a million pictures of my kids and I feel like I am getting better at it by the day.  I asked my hubby for a new camera for Christmas this year and I think I want to get a DSLR.  My current camera is nice but I'm limited to what I can do and the screen is cracked so it's hard to see the pictures before uploading them.  I'd love to improve on my photography skills and maybe even take a class or two.  I received Photoshop Elements two Christmas's ago and I am still learning how to use it.  Can you tell I love all things creative?!  Photography, decorating, DIY...

September 17, 2012

I LOVE craigslist!

If you have never searched for or purchased something from craigslist, I highly recommend it!  I have purchased several things (for the home) from there and it has saved me so much money!  Anyhoo... our living room is tiny and with a big sectional and chairs, it doesn't leave much room for anything else.  I was in need of a TV stand with storage that was low enough to not obstruct the windows on that wall, but long enough to take advantage of the space there.  One day while searching on craigslist, I found the perfect piece! It's a credenza that lived in a hotel in the 60's (according to the previous owner) and was about a 15 minute drive and only cost $30! 
Now I wish I had a picture of exactly what it looked like when I first got it home but, alas, I do not.  The only immediate change I made was ripping the brown carpet-like material off of the top.  I'm not sure what it's purpose was, but it was nasty and had to go.  What was left of the top was particle board so I decided to paint it to match the laminate base.  That was over 2 years ago:


I loved our TV stand and it functioned perfectly except that the weight of the TV and media stuff was causing the particle board top to bow and I wasn't loving the color.  It also wasn't the greatest looking up-close, you could totally tell it was painted particle board!  About 3 months ago I convinced my sweet hubby to help me carry that bad-boy out to the garage so I could revamp it.  Tom looked at me all crazy and said "I have a feeling we will have to buy a new TV stand after this".  Clearly he didn't have very much faith in me!
Honestly, I wasn't exactly sure how my "idea" for this one was going to work out either.  I figured if I ruin it, I only spent $30 on it over two years ago so we got our money's worth.  The first order of business was to rip that top off & it was a huge pain in the arse! Tom and I swung a sludge hammer at this piece of furniture for at least an hour before we got it to budge.  It's a wonder we didn't ruin it.

I had seen some old barn wood at an antique store nearby that I thought should work as a new (and affordable) top so off I went to pick out my pieces of wood.  I ended up buying a ten foot long piece for $10 and an eight footer for $8. I needed the top, once assembled, to be about 8 feet long and 2 feet deep.  I got them home, measured and cut them to size using a jigsaw (it's the only saw I own so far) and sanded them smooth with a palm sander. 
Then it was time to seal the wood for a nice finished look.  I used Minwax Polycrylic in clear satin.  I did 3 coats to ensure longevity and prevent the wood from splintering any further.  While the poly was drying, I spray painted the frame and drawer fronts with white semi-gloss Rustoleum.  I then attached the top (two pieces of wood) in the same way that the previous top was, screwed on from underneath.  Although it felt secure, I added a few more screws through the top just to be safe. Without further ado, here he is, all made-over:
I painted over the metal strips that wrapped around the drawers and just left the handles chrome.  This furniture upgrade cost me $18 (the paint and poly I already had on hand).  So total this is a $48 piece of furniture (I paid $30 originally for it).  Not bad.  Here are some more pictures, because I am super proud of this piece and so glad I didn't ruin it!


What a difference it makes:
 
I think that about wraps up the living room tour!
 
Here are some sources if you're interested:
white curtain panels: JCP online
couch: Ashley Furniture homestore
lamp: HomeGoods
rush grass ottoman (set of 3): amazon.com
pillows: Target and HomeGoods
hanging lamp: Lowes
mirror: Target
chairs: thrifted
green throw blanket: Tuesday Morning


September 11, 2012

chair debacle

There once was a living room that needed more seating.  After we purchased our new gray couch, the living room felt empty.  The new couch took up less space and didn't seat as many as our previous two "pushed together" couches.  I had a few chairs that had lived in the living room with our old couch but they just didn't flow anymore.  I knew I wanted two matching or very similar chairs to face the couch.  One day while shopping at a local resale shop I found THE chairs!
Oh yes!  They looked like this AND there were two of them!  They looked pretty bad but I could see the potential.  At $20 each, how could I pass them up?  I could tell they were sturdy, wooden chairs that had been painted and the cushions had been slip covered (in an awful fabric).  I loved their shape and mid-century vibe.  I originally thought I would paint them white but ended up stripping them down to their natural wooden state.  It was quite the process!  I don't have any in-progress photos to share but basically I used a natural citrus stripper (comes in a can and sprays out like foam).  It took several coats to remove the paint, but I was pregnant with Owen and that was the safest (not fastest) method.  After stripping the paint off, I lightly sanded them to make everything nice and even.  I could have sealed them with poly or stained them a different color, but I actually used linseed oil to bring out the richness in the wood and protect them.  I am unsure if I'll want to poly or stain them later on so oiling the wood is a great way to protect it without making any permanent change.
 Next it was time to recover those hideous cushions!  The previous owner of the chairs had made a slipcover and I decided to follow that same pattern.  (I'll save the details of that process for a separate post).  I knew I wanted the fabric that I used to incorporate the teal, lime and gray color scheme I had going on already in the room.  It wasn't until I created a mood board for my living room that I finally decided on the fabric: 
In case you aren't familiar with mood boards, it's basically an idea board with all of the objects you want in a room so that you have a better idea of how everything will look together.  I use polyvore.com to create them and it's free but does take some time to do.  Not everything in this board is what I have in my living room, but I just tried to find things that were close to what I had or what I wanted.  I placed the three pillows on the board as fabric options and immediately knew that the middle option was perfect for chair fabric.  It has all three colors that I wanted and isn't too trendy to put on chairs that I hope to have for the long-haul.  I priced it on a few different sites and ended up ordering about 5 yards from maryjos.com for around $15 per yard.
Problem was, I had never used a sewing machine and I planned on this being a complete DIY project.  Cue, mom to the rescue!  She taught me the basics of how to use her sewing machine one afternoon and my first sewing project was a huge success!  My living room chairs were complete:


Not bad, right?  Here they are next to each other in the living room:

I love them!  They are comfortable, sturdy, and practical for this room and how we use it.  The slipcovers come off and are washable and the fabric pulls all of the colors together.  The throw pillows on the chairs are from this seller on etsy.  I'll leave you with a before and after of my chair redo:

before
after


September 5, 2012

the gray couch


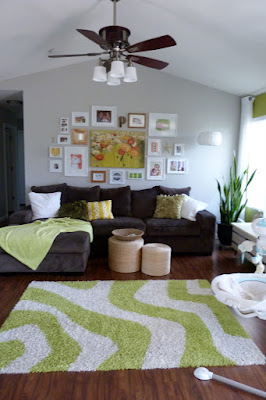
It's the reason our whole living room changed last February and the reason we went from having a mostly beige house to an all gray house.  It's big and it's comfy and we love it!  Lets take a walk down memory lane with our living room, shall we?  This is the first time I photographed it after moving in 5 years ago:
Clearly this isn't a great picture but it was before we even had any paint on the walls (which feels like forever ago).  Shortly after moving in we painted things and had added some curtains:
It was certainly a colorful space and almost had a tropical vibe.  The colors all stemmed from the artwork that I painted for the walls.  After being in our house for a little over 2 years we decided to put it on the market.  We were hoping to sell and build a custom home.  I repainted the blue wall to tone things down a bit so that it would appeal to more buyers:
A couple of months later we learned that we were expecting our daughter and took our home off the market.  I wasn't sure that trying to sell and build a home while being pregnant was the best idea.  Needless to say I repainted again...

We also replaced our carpet throughout our house that summer.  The carpet wasn't in terrible condition, but our dog Charlie was a puppy at one point and had many accidents on those floors.  I could not get the smell out of some areas and it drove me crazy!  We got a great deal on some discontinued Pergo flooring from Lowe's and decided to do away with the carpet.  Plus I just love the look and ease of wood floors. 
Our couch had definitely seen better days.  It actually looks like one sectional but its two separate chaises pushed together and stuffed with pillows.  Sneaky.  Once we installed the floors our couches kept sliding apart and the microfiber material was not as easy to keep clean with a dog and a baby.  That is when we decided to get this guy:
It came from Ashley Furniture and is kid and pet friendly!  The dark color is good for hiding stains and it is deep and very comfortable.  I knew as soon as we bought it that I would want to paint the beige walls gray.  I was ready to jump on the gray bandwagon.  So... I painted the couch wall for a FOURTH time!  By this point I should be a professional painter.  My husband thinks I am crazy.  He is so awesome though and just goes with the flow!   Once we had our new couch I felt like it needed something to fill the other part of the room.  I had a vision of two chairs facing the sofa.  We definitely needed more seating!  It took me one whole year to find just the right ones.  Stay tuned for that story!